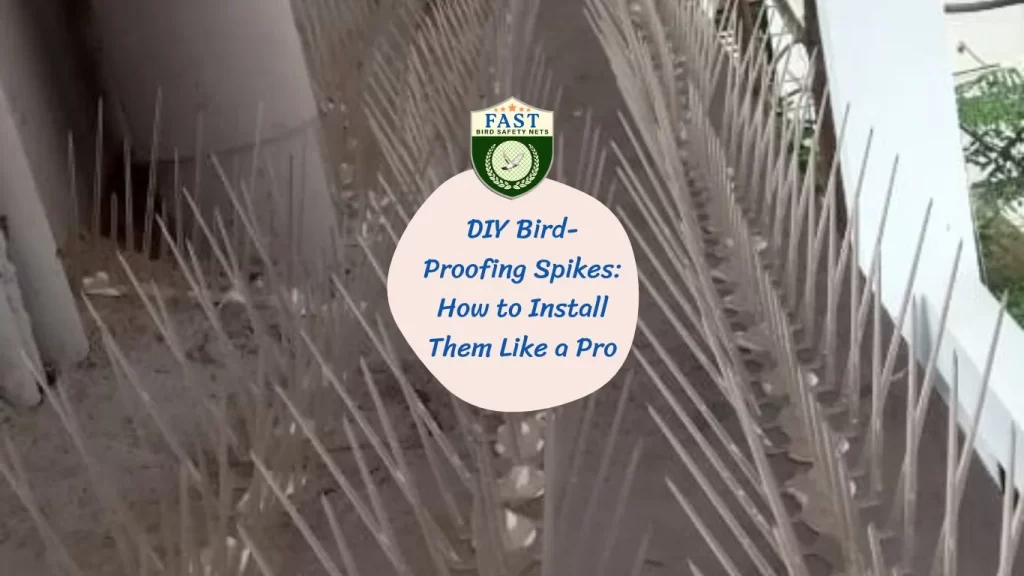

Birds can be a nuisance when they decide to roost on your property. Bird-proofing spikes are an effective, humane way to deter them. Here’s a step-by-step guide on how to install bird-proofing spikes like a pro.
Materials Needed
- Bird-proofing spikes
- Adhesive or screws (depending on the surface)
- Measuring tape
- Cleaning supplies (soap, water, brush)
- Safety gloves
Step-by-Step Installation Guide
- Preparation
- Safety First: Wear safety gloves to protect your hands during installation.
- Clean the Surface: Use soap, water, and a brush to thoroughly clean the area where you will install the spikes. Removing dirt and debris ensures the adhesive will stick properly.
- Measure the Area: Use a measuring tape to determine the length of the area you need to cover. This will help you calculate how many spike strips you’ll need.
- Choose Your Spikes
- Type of Spikes: Select spikes made from durable materials like stainless steel or polycarbonate. Make sure they are designed to be effective for the type of birds you’re dealing with.
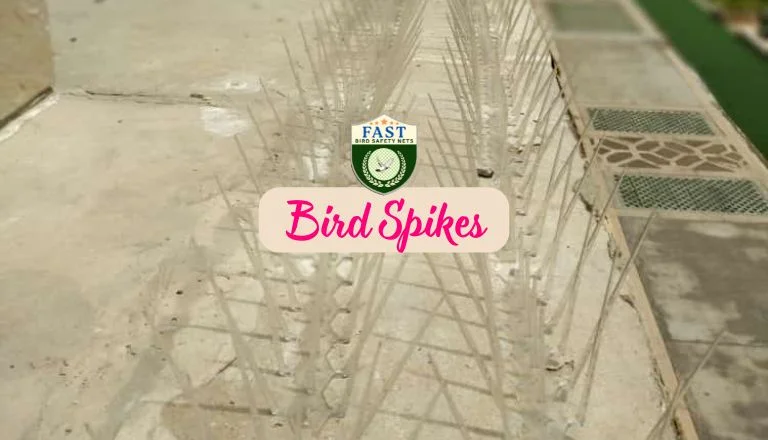
- Positioning the Spikes
- Placement: Position the spikes on ledges, window sills, rooftops, or any surface where birds tend to roost. Ensure they cover the entire surface to prevent birds from finding gaps.
- Spacing: Spikes should be placed close enough together to prevent birds from landing between them. Follow the manufacturer’s guidelines for spacing.
- Installation
- Adhesive Method: Apply a strong, weather-resistant adhesive to the base of the spikes. Press the spikes firmly onto the cleaned surface. Hold in place for a few seconds to ensure a good bond.
- Screw Method: If the surface allows, use screws to secure the spikes. Pre-drill holes if necessary, and then screw the spikes into place. This method provides extra durability, especially on wooden or metal surfaces.
- Final Check
- Secure Attachment: Ensure all spikes are firmly attached and there are no loose sections. This prevents birds from dislodging the spikes.
- Adjustments: Make any necessary adjustments to cover gaps or areas where birds might still try to land.
- Maintenance
- Regular Inspections: Check the spikes periodically to ensure they remain securely attached and in good condition.
- Cleaning: Occasionally clean the spikes to remove any debris that might accumulate, ensuring they remain effective.
Conclusion
By following these steps, you can effectively install bird-proofing spikes and protect your property from bird-related damage and mess. With careful preparation and proper installation, you’ll create a humane deterrent that keeps birds at bay. Happy DIY bird-proofing!