
Cricket nets are essential for practicing batting, bowling, and fielding skills. Proper installation ensures safety and functionality. This guide provides step-by-step instructions for installing cricket nets effectively.
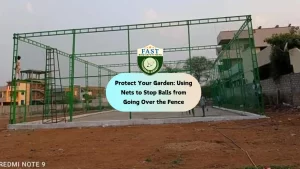
Selecting the Location: Choose a suitable location for installing the cricket nets, considering factors such as space, accessibility, and sunlight exposure. Ensure the area is flat, free from obstacles, and provides ample room for batting and bowling practice.
Preparing the Ground: Clear the selected area of any debris, rocks, or vegetation. Use a rake or shovel to level the ground surface, ensuring it is smooth and even. Compact the soil or add gravel if necessary to enhance stability and drainage.
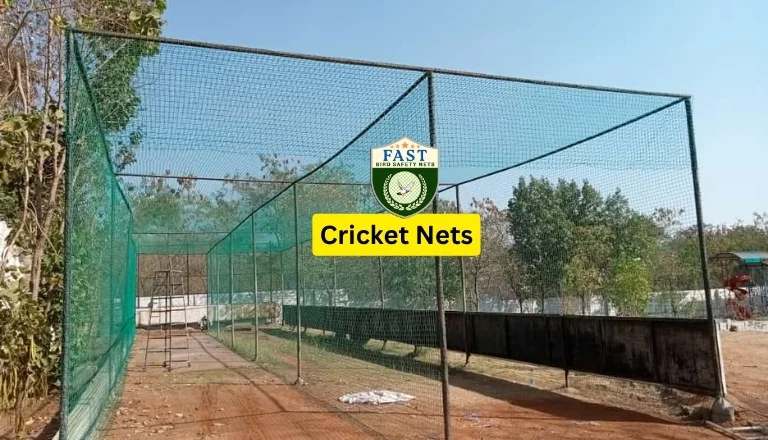
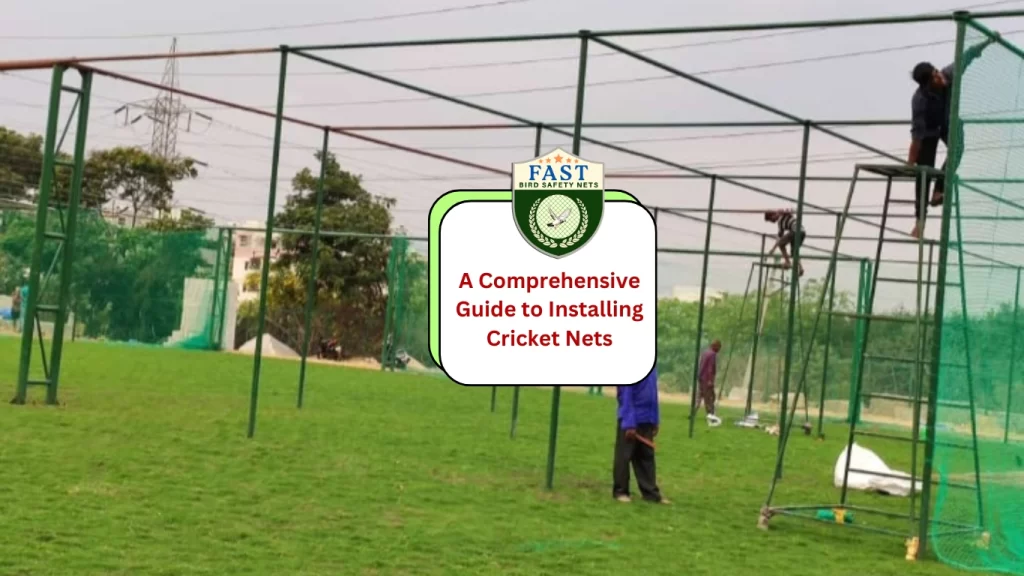
Assembling the Frame: Follow the manufacturer’s instructions to assemble the frame of the cricket nets. Typically, the frame consists of metal poles or tubes that are interconnected to create a sturdy structure. Use nuts, bolts, or connectors to secure the frame components together.
Attaching the Netting: Once the frame is assembled, attach the cricket netting to the structure. Start by draping the netting over the top of the frame and then gradually pull it down and secure it along the sides and bottom using hooks, clips, or ties. Ensure the netting is taut and free from wrinkles or sagging.
Securing the Frame: Anchor the frame of the cricket nets securely to the ground to prevent tipping or shifting during use. Use stakes, anchors, or sandbags to secure the base of the frame firmly to the ground. Double-check the stability of the frame to ensure it can withstand the impact of cricket balls.
Adding Accessories: Consider adding optional accessories such as boundary lines, target sheets, or ball collectors to enhance the functionality of the cricket nets. Install these accessories as per the manufacturer’s guidelines, ensuring they are securely attached to the frame.
Testing and Adjusting: Before use, thoroughly inspect the cricket nets to ensure they are securely installed and free from any defects or hazards. Test the netting by hitting cricket balls into it at various speeds and angles to verify its strength and durability. Make any necessary adjustments to improve performance and safety.
Regular Maintenance: Maintain the cricket nets regularly to prolong their lifespan and ensure optimal performance. Inspect the netting for signs of wear, tear, or damage, and repair or replace any damaged sections promptly. Clean the netting periodically to remove dirt, debris, and accumulated cricket ball residue.
Conclusion: By following these step-by-step instructions, you can install cricket nets effectively and create a safe and functional training environment for cricket enthusiasts. Proper installation, regular maintenance, and proactive adjustments are essential for maximizing the longevity and performance of the nets, allowing players to practice and improve their skills with confidence.