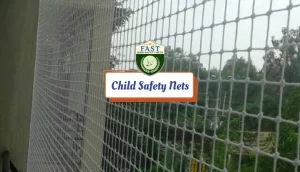
Are you looking to enhance the safety of your balcony while still enjoying the outdoors? balcony net installation can be a great solution. Not only does it provide added protection, but it also offers peace of mind, especially if you have children or pets. In this guide, we’ll walk you through the steps to safely install a net on your balcony.

- Assess Your Balcony: Before you start, take a close look at your balcony to assess its structure and dimensions. Note any potential hazards or obstacles that could affect the installation process.
- Choose the Right Net: Select a high-quality net that is specifically designed for outdoor use. Ensure that it is strong, durable, and UV-resistant to withstand various weather conditions.
- Measure Your Balcony: Accurate measurements are crucial for a proper fit. Measure the length and width of your balcony, as well as the height from the floor to the railing.
- Gather Your Tools: You’ll need basic tools such as a drill, screws, measuring tape, and a level for installation. Make sure you have everything on hand before you begin.
- Prepare the Balcony: Clean the balcony thoroughly to remove any dirt, dust, or debris. This will ensure better adhesion and a more secure installation.
- Install Mounting Hardware: If your net requires mounting hardware, follow the manufacturer’s instructions to securely attach it to the balcony railing or walls. Use a level to ensure that the hardware is straight and level.
- Attach the Net: Carefully unfurl the net and attach it to the mounting hardware using the provided hooks, clips, or ties. Start at one corner and work your way around, making sure the net is taut and properly aligned.
- Secure the Edges: To prevent the net from flapping in the wind or coming loose, secure the edges with additional fasteners or zip ties. Make sure all sides are tightly secured to the railing or walls.
- Inspect for Safety: Once the net is installed, thoroughly inspect it to ensure that there are no gaps or loose spots. Test its strength by gently pulling on different sections to make sure it can support weight.
- Regular Maintenance: Periodically check the net for any signs of wear and tear, especially after severe weather conditions. Replace any damaged or weakened areas promptly to maintain safety.
By following these steps, you can safely install a net on your balcony and enjoy added protection and peace of mind. Remember to prioritize safety at all times and consult a professional if you’re unsure about any aspect of the installation process. Now, you can relax and enjoy your balcony without worrying about safety concerns.


